Configuration 
The Icinga configuration can be easily managed with either the Icinga Director, config management tools or plain text within the Icinga DSL.
Before looking into web based configuration or any sort of automation, we recommend to start with the configuration files and fully understand the possibilities of the Icinga DSL (Domain Specific Language).
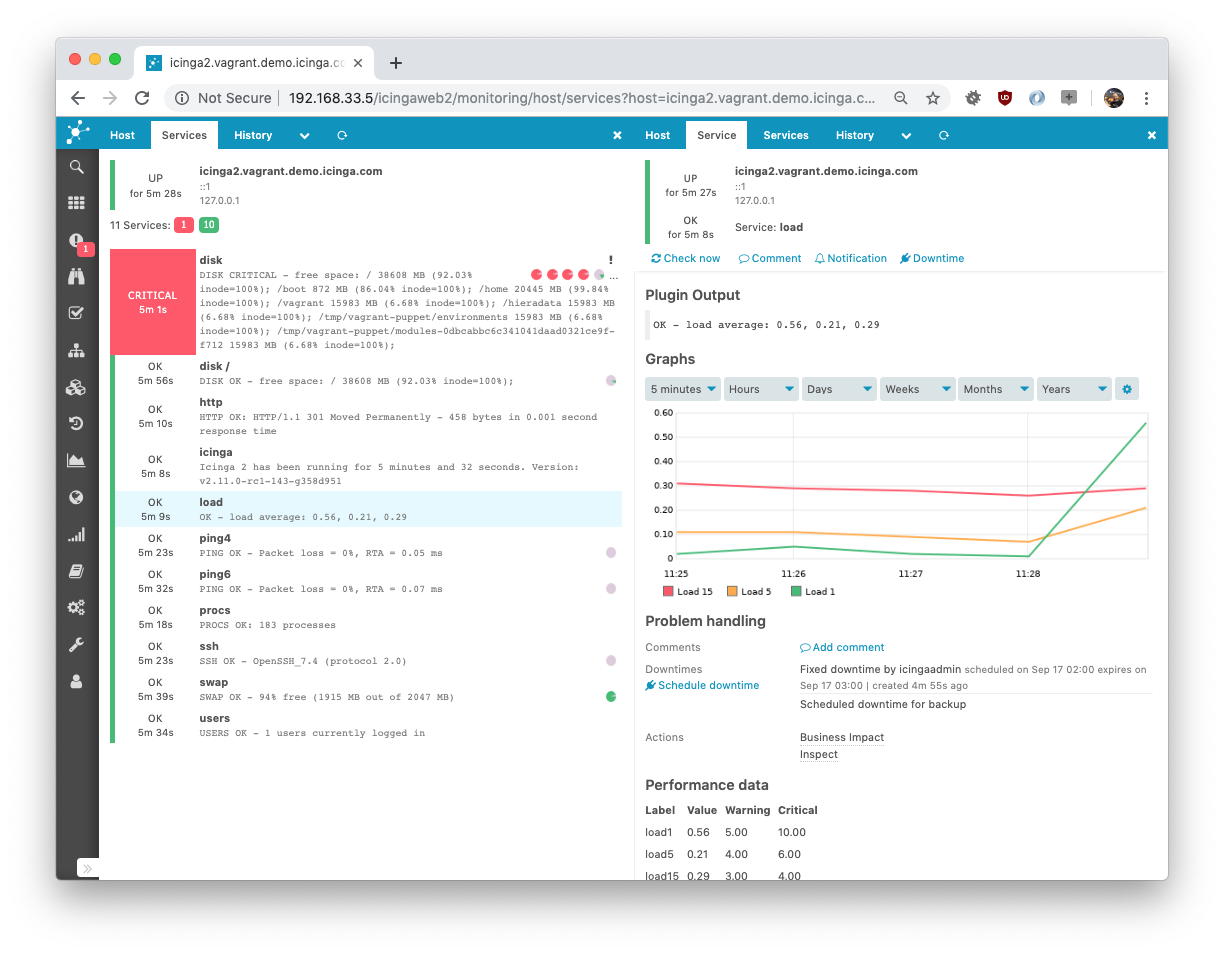
The package installation provides example configuration which already monitors the local Icinga server. You can view the monitoring details in Icinga Web.
The Language Reference chapter explains details on value types (string, number, dictionaries, etc.) and the general configuration syntax.
Configuration Best Practice 
If you are ready to configure additional hosts, services, notifications, dependencies, etc., you should think about the requirements first and then decide for a possible strategy.
There are many ways of creating Icinga 2 configuration objects:
- The Icinga Director as web based and/or automation configuration interface
- Manually with your preferred editor, for example vi(m), nano, notepad, etc.
- Generated by a configuration management tool such as Puppet, Chef, Ansible, etc.
- A custom exporter script from your CMDB or inventory tool
- etc.
Find the best strategy for your own configuration and ask yourself the following questions:
- Do your hosts share a common group of services (for example linux hosts with disk, load, etc. checks)?
- Only a small set of users receives notifications and escalations for all hosts/services?
If you can at least answer one of these questions with yes, look for the apply rules logic instead of defining objects on a per host and service basis.
- You are required to define specific configuration for each host/service?
- Does your configuration generation tool already know about the host-service-relationship?
Then you should look for the object specific configuration setting host_name etc. accordingly.
You decide on the “best” layout for configuration files and directories. Ensure that the icinga2.conf configuration file includes them.
Consider these ideas:
- tree-based on locations, host groups, specific host attributes with sub levels of directories.
- flat
hosts.conf,services.conf, etc. files for rule based configuration. - generated configuration with one file per host and a global configuration for groups, users, etc.
- one big file generated from an external application (probably a bad idea for maintaining changes).
- your own.
In either way of choosing the right strategy you should additionally check the following:
- Are there any specific attributes describing the host/service you could set as
varscustom variables? You can later use them for applying assign/ignore rules, or export them into external interfaces. - Put hosts into hostgroups, services into servicegroups and use these attributes for your apply rules.
- Use templates to store generic attributes for your objects and apply rules making your configuration more readable. Details can be found in the using templates chapter.
- Apply rules may overlap. Keep a central place (for example, services.conf or notifications.conf) storing the configuration instead of defining apply rules deep in your configuration tree.
- Every plugin used as check, notification or event command requires a
Commanddefinition. Further details can be looked up in the check commands chapter.
If you are planning to use a distributed monitoring setup with master, satellite and client installations take the configuration location into account too. Everything configured on the master, synced to all other nodes? Or any specific local configuration (e.g. health checks)?
There is a detailed chapter on distributed monitoring scenarios. Please ensure to have read the introduction at first glance.
If you happen to have further questions, do not hesitate to join the community forum and ask community members for their experience and best practices.
Your Configuration 
If you prefer to organize your own local object tree, you can also remove
include_recursive "conf.d" from your icinga2.conf file.
Create a new configuration directory, e.g. objects.d and include it
in your icinga2.conf file.
[root@icinga2-master1.localdomain /]# mkdir -p /etc/icinga2/objects.d

[root@icinga2-master1.localdomain /]# vim /etc/icinga2/icinga2.conf

/* Local object configuration on our master instance. */
include_recursive "objects.d"
This approach is used by the Icinga 2 Puppet module.
If you plan to setup a distributed setup with HA clusters and clients, please refer to this chapter
for examples with zones.d as configuration directory.
Configuration Overview 
icinga2.conf 
An example configuration file is installed for you in /etc/icinga2/icinga2.conf.
Here’s a brief description of the example configuration:
/**
* Icinga 2 configuration file
* -- this is where you define settings for the Icinga application including
* which hosts/services to check.
*
* For an overview of all available configuration options please refer
* to the documentation that is distributed as part of Icinga 2.
*/
Icinga 2 supports C/C++-style comments.
/* * The constants.conf defines global constants. / include “constants.conf”
The include directive can be used to include other files.
/**
* The zones.conf defines zones for a cluster setup.
* Not required for single instance setups.
*/
include "zones.conf"
The Icinga Template Library provides a set of common templates and CheckCommand definitions.
/**
* The Icinga Template Library (ITL) provides a number of useful templates
* and command definitions.
* Common monitoring plugin command definitions are included separately.
*/
include <itl>
include <plugins>
include <plugins-contrib>
include <manubulon>

/**
* This includes the Icinga 2 Windows plugins. These command definitions
* are required on a master node when a client is used as command endpoint.
*/
include <windows-plugins>

/**
* This includes the NSClient++ check commands. These command definitions
* are required on a master node when a client is used as command endpoint.
*/
include <nscp>

/**
* The features-available directory contains a number of configuration
* files for features which can be enabled and disabled using the
* icinga2 feature enable / icinga2 feature disable CLI commands.
* These commands work by creating and removing symbolic links in
* the features-enabled directory.
*/
include "features-enabled/*.conf"
This include directive takes care of including the configuration files for all
the features which have been enabled with icinga2 feature enable. See
Enabling/Disabling Features for more details.
/**
* Although in theory you could define all your objects in this file
* the preferred way is to create separate directories and files in the conf.d
* directory. Each of these files must have the file extension ".conf".
*/
include_recursive "conf.d"
You can put your own configuration files in the conf.d directory. This directive makes sure that all of your own configuration files are included.
constants.conf 
The constants.conf configuration file can be used to define global constants.
By default, you need to make sure to set these constants:
- The
PluginDirconstant must be set to the path where the Monitoring Project plugins are installed. This constant is used by a number of built-in check command definitions. - The
NodeNameconstant defines your local node name. Should be set to FQDN which is the default if not set. This constant is required for local host configuration, monitoring remote clients and cluster setup.
Example:
/* The directory which contains the plugins from the Monitoring Plugins project. */
const PluginDir = "/usr/lib64/nagios/plugins"

/* The directory which contains the Manubulon plugins.
* Check the documentation, chapter "SNMP Manubulon Plugin Check Commands", for details.
*/
const ManubulonPluginDir = "/usr/lib64/nagios/plugins"

/* Our local instance name. By default this is the server's hostname as returned by `hostname --fqdn`.
* This should be the common name from the API certificate.
*/
//const NodeName = "localhost"

/* Our local zone name. */
const ZoneName = NodeName

/* Secret key for remote node tickets */
const TicketSalt = ""
The ZoneName and TicketSalt constants are required for remote client
and distributed setups. The node setup/wizard CLI tools take care of
populating these values.
zones.conf 
This file can be used to specify the required Zone and Endpoint configuration object for distributed monitoring.
By default the NodeName and ZoneName constants will be used.
It also contains several global zones for distributed monitoring environments.
Please ensure to modify this configuration with real names i.e. use the FQDN
mentioned in this chapter
for your Zone and Endpoint object names.
The conf.d Directory 
This directory contains example configuration which should help you get started with monitoring the local host and its services. It is included in the icinga2.conf configuration file by default.
It can be used as reference example for your own configuration strategy. Just keep in mind to include the main directories in the icinga2.conf file.
Note
You can remove the include directive in icinga2.conf if you prefer your own way of deploying Icinga 2 configuration.
Further details on configuration best practice and how to build your own strategy is described in this chapter.
Available configuration files which are installed by default:
- hosts.conf
- services.conf
- users.conf
- notifications.conf
- commands.conf
- groups.conf
- templates.conf
- downtimes.conf
- timeperiods.conf
- api-users.conf
- app.conf
hosts.conf 
The hosts.conf file contains an example host based on your
NodeName setting in constants.conf. You
can use global constants for your object names instead of string
values.
The import keyword is used to import the generic-host template which
takes care of setting up the host check command to hostalive. If you
require a different check command, you can override it in the object definition.
The vars attribute can be used to define custom variables which are available
for check and notification commands. Most of the Plugin Check Commands
in the Icinga Template Library require an address attribute.
The custom variable os is evaluated by the linux-servers group in
groups.conf making the local host a member.
The example host will show you how to:
- define http vhost attributes for the
httpservice apply rule defined in services.conf. - define disks (all, specific
/) and their attributes for thediskservice apply rule defined in services.conf. - define notification types (
mail) and set the groups attribute. This will be used by notification apply rules in notifications.conf.
If you’ve installed Icinga Web 2, you can
uncomment the http vhost attributes and reload Icinga 2. The apply
rules in services.conf will automatically
generate a new service checking the /icingaweb2 URI using the http
check.
/*
* Host definitions with object attributes
* used for apply rules for Service, Notification,
* Dependency and ScheduledDowntime objects.
*
* Tip: Use `icinga2 object list --type Host` to
* list all host objects after running
* configuration validation (`icinga2 daemon -C`).
*/

/*
 * This is an example host based on your
 * local host's FQDN. Specify the NodeName
 * constant in `constants.conf` or use your
 * own description, e.g. "db-host-1".
 */

object Host NodeName {
  /* Import the default host template defined in `templates.conf`. */
  import "generic-host"

  /* Specify the address attributes for checks e.g. `ssh` or `http`. */
  address = "127.0.0.1"
  address6 = "::1"

  /* Set custom variable `os` for hostgroup assignment in `groups.conf`. */
  vars.os = "Linux"

  /* Define http vhost attributes for service apply rules in `services.conf`. */
  vars.http_vhosts["http"] = {
    http_uri = "/"
  }
  /* Uncomment if you've successfully installed Icinga Web 2. */
  //vars.http_vhosts["Icinga Web 2"] = {
  //  http_uri = "/icingaweb2"
  //}

  /* Define disks and attributes for service apply rules in `services.conf`. */
  vars.disks["disk"] = {
    /* No parameters. */
  }
  vars.disks["disk /"] = {
    disk_partitions = "/"
  }

  /* Define notification mail attributes for notification apply rules in `notifications.conf`. */
  vars.notification["mail"] = {
    /* The UserGroup `icingaadmins` is defined in `users.conf`. */
    groups = [ "icingaadmins" ]
  }
}
This is only the host object definition. Now we’ll need to make sure that this host and your additional hosts are getting services applied.
Tip
If you don’t understand all the attributes and how to use apply rules, don’t worry – the monitoring basics chapter will explain that in detail.
services.conf 
These service apply rules will show you how to monitor the local host, but also allow you to re-use or modify them for your own requirements.
You should define all your service apply rules in services.conf
or any other central location keeping them organized.
By default, the local host will be monitored by the following services
| Service(s) | Applied on host(s) |
|---|---|
load, procs, swap, users, icinga |
The NodeName host only. |
ping4, ping6 |
All hosts with address resp. address6 attribute. |
ssh |
All hosts with address and vars.os set to Linux |
http, optional: Icinga Web 2 |
All hosts with custom variable http_vhosts defined as dictionary. |
disk, disk / |
All hosts with custom variable disks defined as dictionary. |
The Debian packages also include an additional apt service check applied to the local host.
The command object icinga for the embedded health check is provided by the
Icinga Template Library (ITL) while http_ip, ssh, load, processes,
users and disk are all provided by the Plugin Check Commands
which we enabled earlier by including the itl and plugins configuration file.
Example load service apply rule:
apply Service "load" {
import "generic-service"

check_command = "load"

/* Used by the ScheduledDowntime apply rule in `downtimes.conf`. */
vars.backup_downtime = "02:00-03:00"

assign where host.name == NodeName
}
The apply keyword can be used to create new objects which are associated with
another group of objects. You can import existing templates, define (custom)
attributes.
The custom variable backup_downtime is defined to a specific timerange string.
This variable value will be used for applying a ScheduledDowntime object to
these services in downtimes.conf.
In this example the assign where condition is a boolean expression which is
evaluated for all objects of type Host and a new service with name “load”
is created for each matching host. Expression operators
may be used in assign where conditions.
Multiple assign where conditions can be combined with AND using the && operator
as shown in the ssh example:
apply Service "ssh" {
  import "generic-service"

  check_command = "ssh"

  assign where host.address && host.vars.os == "Linux"
}
In this example, the service ssh is applied to all hosts having the address
attribute defined AND having the custom variable os set to the string
Linux.
You can modify this condition to match multiple expressions by combining AND
and OR using && and || operators, for example
assign where host.address && (vars.os == "Linux" || vars.os == "Windows").
A more advanced example is shown by the http and disk service apply
rules. While one apply rule for ssh will only create a service for matching
hosts, you can go one step further: Generate apply rules based on array items
or dictionary key-value pairs.
The idea is simple: Your host in hosts.conf defines the
disks dictionary as custom variable in vars.
Remember the example from hosts.conf:
...
  /* Define disks and attributes for service apply rules in `services.conf`. */
  vars.disks["disk"] = {
    /* No parameters. */
  }
  vars.disks["disk /"] = {
    disk_partition = "/"
  }
...
This dictionary contains multiple service names we want to monitor. disk
should just check all available disks, while disk / will pass an additional
parameter disk_partition to the check command.
You’ll recognize that the naming is important – that’s the very same name as it is passed from a service to a check command argument. Read about services and passing check commands in this chapter.
Using apply Service for omits the service name, it will take the key stored in
the disk variable in key => config as new service object name.
The for keyword expects a loop definition, for example key => value in dictionary
as known from Perl and other scripting languages.
Once defined like this, the apply rule defined below will do the following:
- only match hosts with
host.vars.disksdefined through theassign wherecondition - loop through all entries in the
host.vars.disksdictionary. That’sdiskanddisk /as keys. - call
applyon each, and set the service object name from the provided key - inside apply, the
generic-servicetemplate is imported - defining the disk check command requiring command arguments like
disk_partition - adding the
configdictionary items tovars. Simply said, there’s nowvars.disk_partitiondefined for the generated service
Configuration example:
apply Service for (disk => config in host.vars.disks) {
  import "generic-service"

  check_command = "disk"

  vars += config
}
A similar example is used for the http services. That way you can make your
host the information provider for all apply rules. Define them once, and only
manage your hosts.
Look into notifications.conf how this technique is used for applying notifications to hosts and services using their type and user attributes.
Don’t forget to install the check plugins required by the hosts and services and their check commands.
Further details on the monitoring configuration can be found in the monitoring basics chapter.
users.conf 
Defines the icingaadmin User and the icingaadmins UserGroup. The latter is used in
hosts.conf for defining a custom host attribute later used in
notifications.conf for notification apply rules.
object User "icingaadmin" {
  import "generic-user"

  display_name = "Icinga 2 Admin"
  groups = [ "icingaadmins" ]

  email = "icinga@localhost"
}

object UserGroup "icingaadmins" {
  display_name = "Icinga 2 Admin Group"
}
notifications.conf 
Notifications for check alerts are an integral part or your Icinga 2 monitoring stack.
The examples in this file define two notification apply rules for hosts and services.
Both apply rules match on the same condition: They are only applied if the
nested dictionary attribute notification.mail is set.
Please note that the to keyword is important in notification apply rules
defining whether these notifications are applies to hosts or services.
The import keyword imports the specific mail templates defined in templates.conf.
The interval attribute is not explicitly set – it defaults to 30 minutes.
By setting the user_groups to the value provided by the
respective host.vars.notification.mail attribute we’ll
implicitely use the icingaadmins UserGroup defined in users.conf.
apply Notification "mail-icingaadmin" to Host {
  import "mail-host-notification"

  user_groups = host.vars.notification.mail.groups
  users = host.vars.notification.mail.users

  assign where host.vars.notification.mail
}

apply Notification "mail-icingaadmin" to Service {
  import "mail-service-notification"

  user_groups = host.vars.notification.mail.groups
  users = host.vars.notification.mail.users

  assign where host.vars.notification.mail
}
More details on defining notifications and their additional attributes such as filters can be read in this chapter.
commands.conf 
This is the place where your own command configuration can be defined. By default only the notification commands used by the notification templates defined in templates.conf.
You can freely customize these notification commands, and adapt them for your needs. Read more on that topic here.
groups.conf 
The example host defined in hosts.conf already has the
custom variable os set to Linux and is therefore automatically
a member of the host group linux-servers.
This is done by using the group assign expressions similar to previously seen apply rules.
object HostGroup "linux-servers" {
  display_name = "Linux Servers"

  assign where host.vars.os == "Linux"
}

object HostGroup "windows-servers" {
  display_name = "Windows Servers"

  assign where host.vars.os == "Windows"
}
Service groups can be grouped together by similar pattern matches. The match function expects a wildcard match string and the attribute string to match with.
object ServiceGroup "ping" {
  display_name = "Ping Checks"

  assign where match("ping*", service.name)
}

object ServiceGroup "http" {
  display_name = "HTTP Checks"

  assign where match("http*", service.check_command)
}

object ServiceGroup "disk" {
  display_name = "Disk Checks"

  assign where match("disk*", service.check_command)
}
templates.conf 
Most of the example configuration objects use generic global templates by default:
template Host "generic-host" {
  max_check_attempts = 5
  check_interval = 1m
  retry_interval = 30s

  check_command = "hostalive"
}

template Service "generic-service" {
  max_check_attempts = 3
  check_interval = 1m
  retry_interval = 30s
}
The hostalive check command is part of the
Plugin Check Commands.
template Notification "mail-host-notification" {
  command = "mail-host-notification"

  states = [ Up, Down ]
  types = [ Problem, Acknowledgement, Recovery, Custom,
            FlappingStart, FlappingEnd,
            DowntimeStart, DowntimeEnd, DowntimeRemoved ]

  period = "24x7"
}

template Notification "mail-service-notification" {
  command = "mail-service-notification"

  states = [ OK, Warning, Critical, Unknown ]
  types = [ Problem, Acknowledgement, Recovery, Custom,
            FlappingStart, FlappingEnd,
            DowntimeStart, DowntimeEnd, DowntimeRemoved ]

  period = "24x7"
}
More details on Notification object attributes can be found here.
downtimes.conf 
The load service apply rule defined in services.conf defines
the backup_downtime custom variable.
The ScheduledDowntime apply rule uses this attribute to define the default value for the time ranges required for recurring downtime slots.
Learn more about downtimes in this chapter.
apply ScheduledDowntime "backup-downtime" to Service {
  author = "icingaadmin"
  comment = "Scheduled downtime for backup"

  ranges = {
    monday = service.vars.backup_downtime
    tuesday = service.vars.backup_downtime
    wednesday = service.vars.backup_downtime
    thursday = service.vars.backup_downtime
    friday = service.vars.backup_downtime
    saturday = service.vars.backup_downtime
    sunday = service.vars.backup_downtime
  }

  assign where service.vars.backup_downtime != ""
}
timeperiods.conf 
This file contains the default timeperiod definitions for 24x7, 9to5
and never. TimePeriod objects are referenced by *period
objects such as hosts, services or notifications.
api-users.conf 
Provides the default ApiUser object named “root” for the API authentication.
app.conf 
Provides the default IcingaApplication object named “app” for additional settings such as disabling notifications globally, etc.